WMS-Inbound-Sales Return Putaway
Article QUm7zsFv · sourceSales Return:
Activity Introduction:
A sales return is when a customer or client sends a product back to the seller. A customer may return an item for several reasons, including : customer may have ordered more items than they need, or a company may have accidentally sent additional products
Activity Description:
STEPS-
- For creating sales return select “Inbound” > “Sales Returns” > "Return Reference"
Here you can create sales return by either of the below mentioned 4 ways :
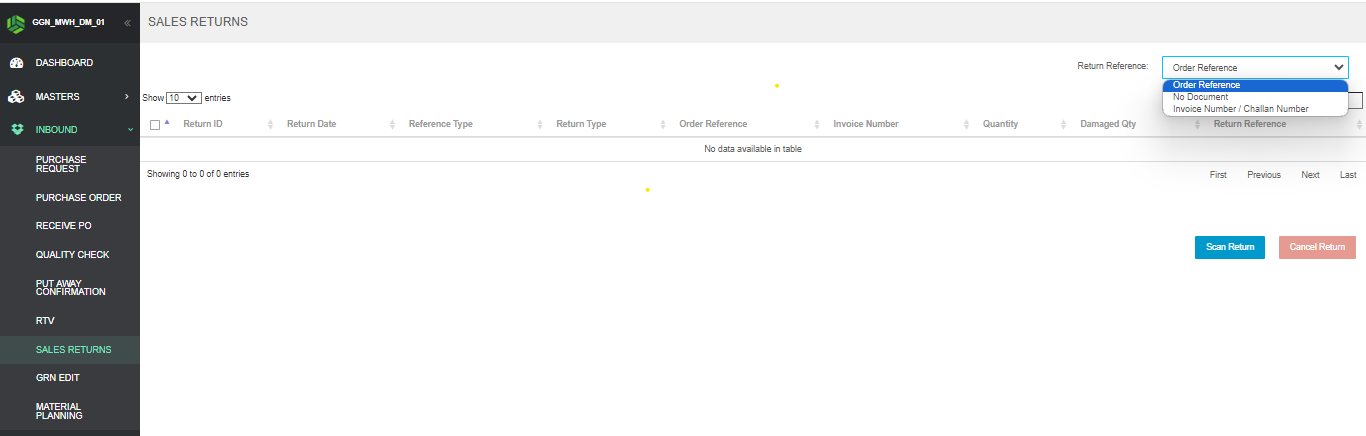
a) Order Reference -
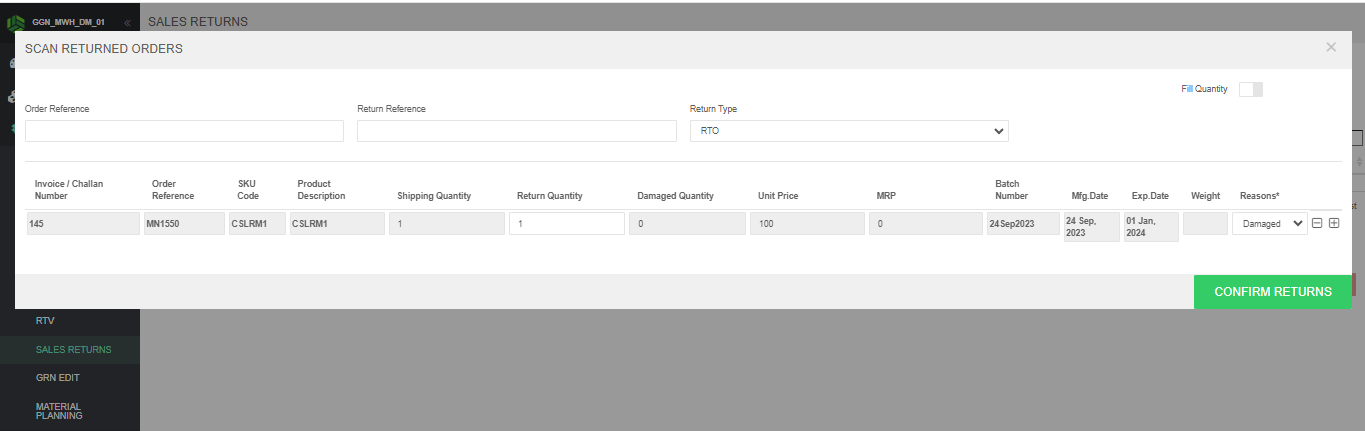
select "Return Reference" as "Order Reference" > click "Scan Return" button
The below pop up will open > enter the order reference and click enter.
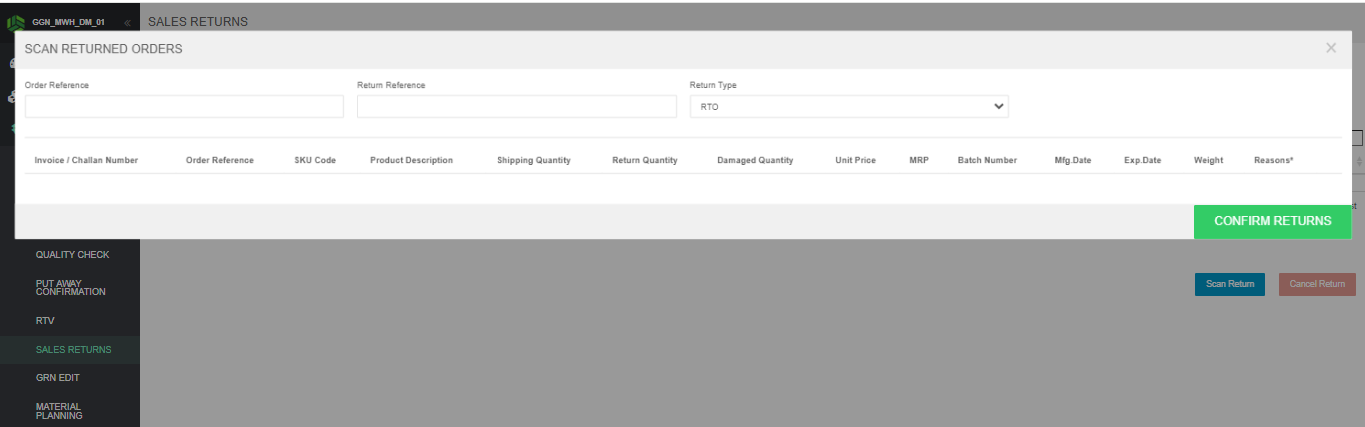
Once clicked enter it will show the order details as below > enter the return quantity > select reason > click confirm returns.
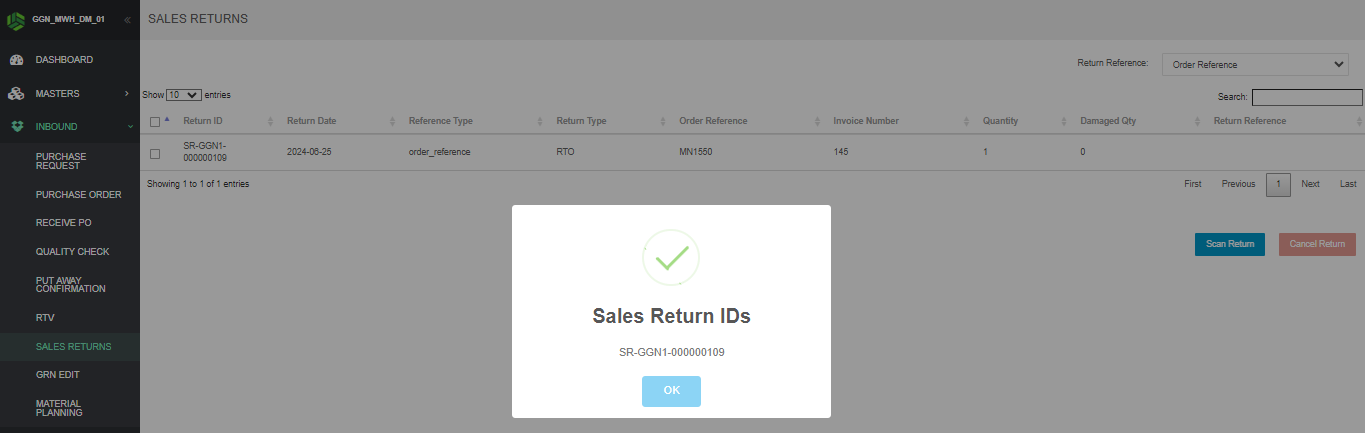
Once clicked confirm returns, confirmation pop up will appear as below.
Proceed with step 2 now.
b) No Document -
select "Return Reference" as "No Document" > click "Scan Return" button
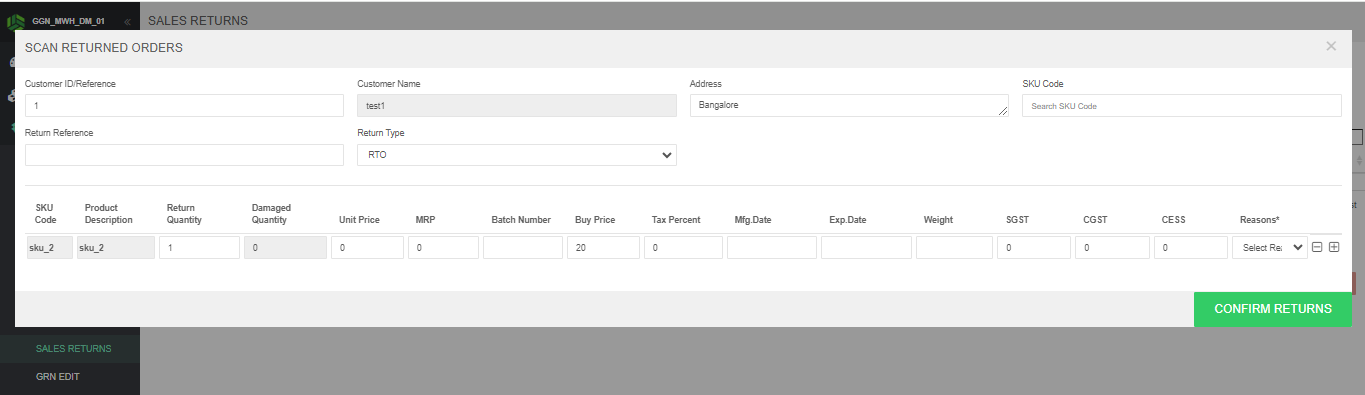
The below pop up will open > enter the customer ID/reference and SKU code > click enter.
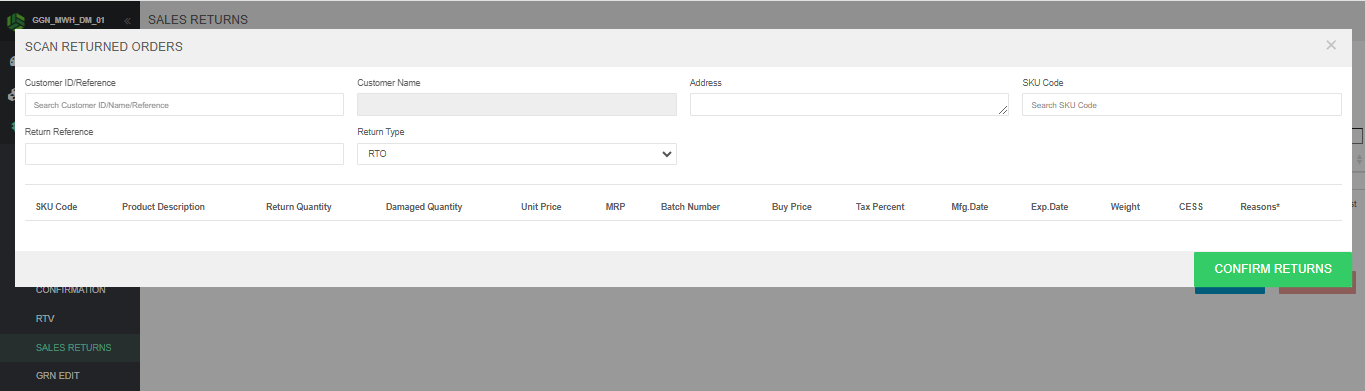
Once clicked enter it will show the SKU details as below > enter the return quantity > select reason > click confirm returns.
Once clicked confirm returns button, confirmation pop up will appear. You can proceed with step 2 now.
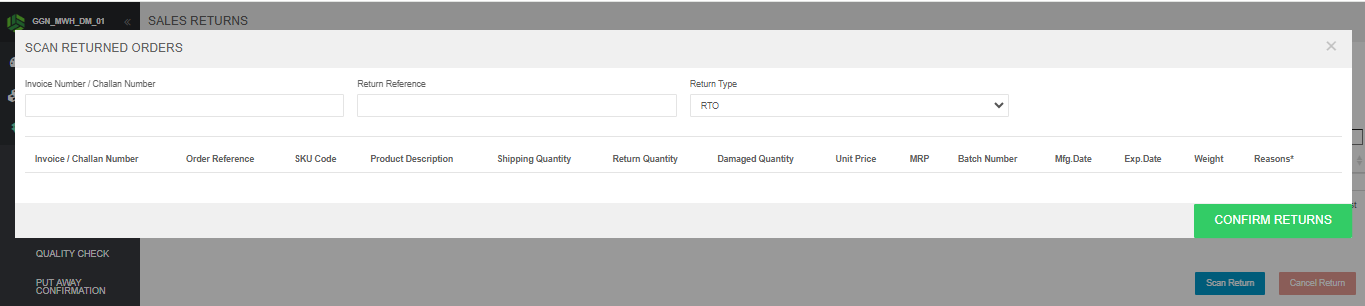
c) Invoice Number / Challan Number -
select "Return Reference" as "Invoice Number / Challan Number" > click "Scan Return" button
The below pop up will open > enter the Invoice Number / Challan Number > click enter.
Once clicked enter it will show the invoice details as below > enter the return quantity > select reason > click confirm returns.
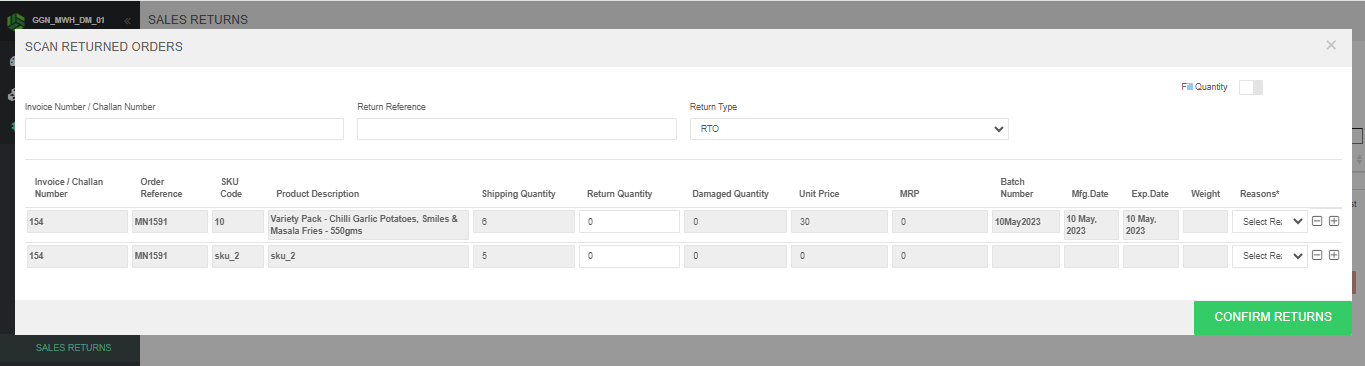
Once clicked confirm returns button, confirmation pop up will appear. You can proceed with step 2 now.
d) UPLOADS
Navigate through Uploads > "Sales Returns Download/ Upload" > click "Download Sales Return Form"
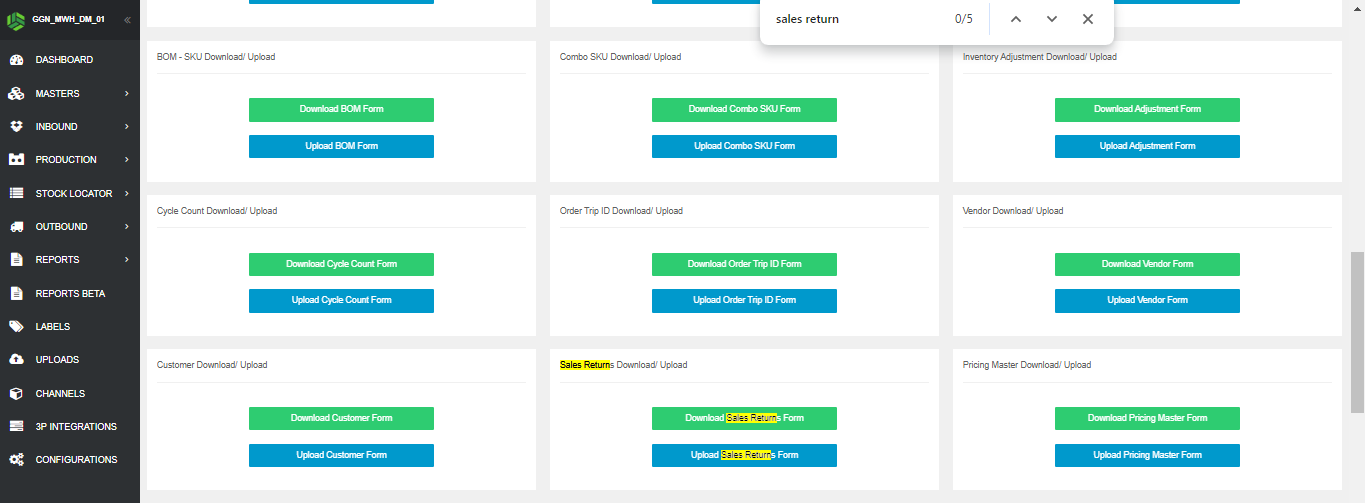
enter all the required details in the sales return form > save > upload it through "Upload Sales return Form" > this will show a success msg in top right corner.
You can now check the uploaded entries in "Inbound" > “Receive PO” > “Sales Return”.
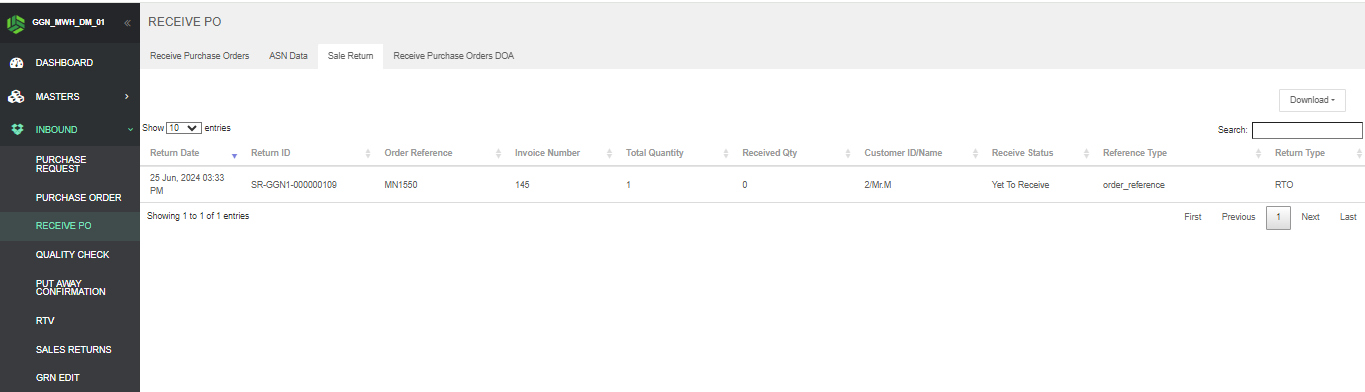
- The confirmed sales return entries will now be reflecting in "Inbound" > “Receive PO” > “Sales Return”.
Here, the GRN need to be done on the Sales Return entry.
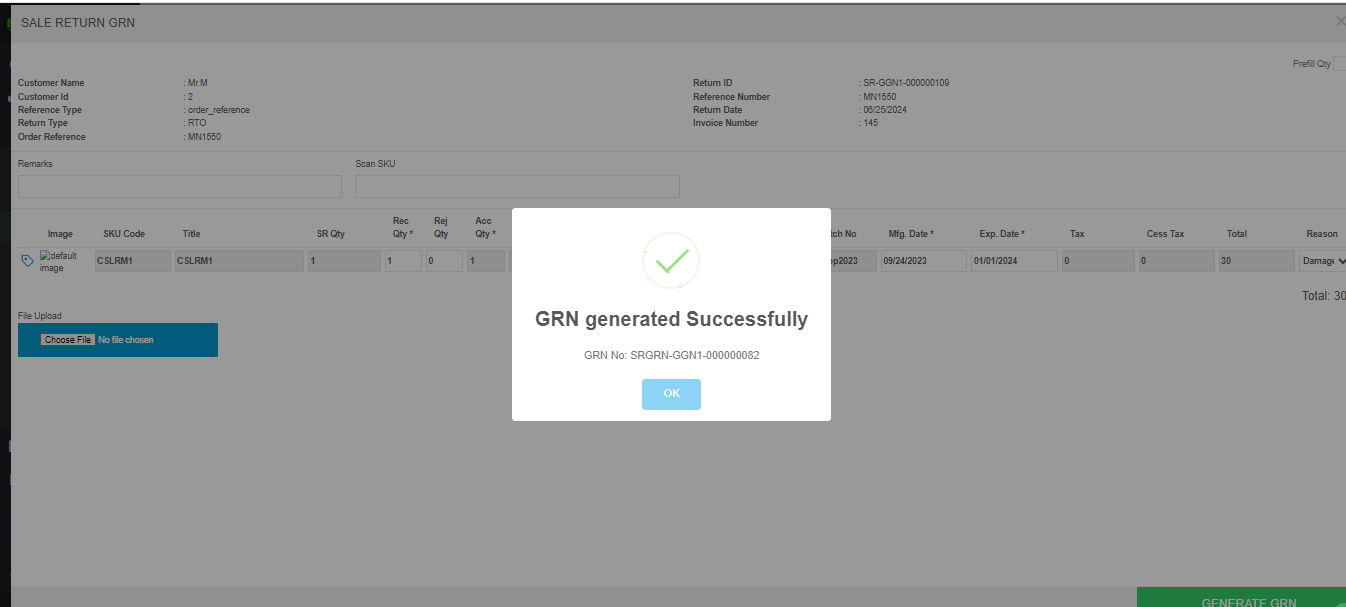
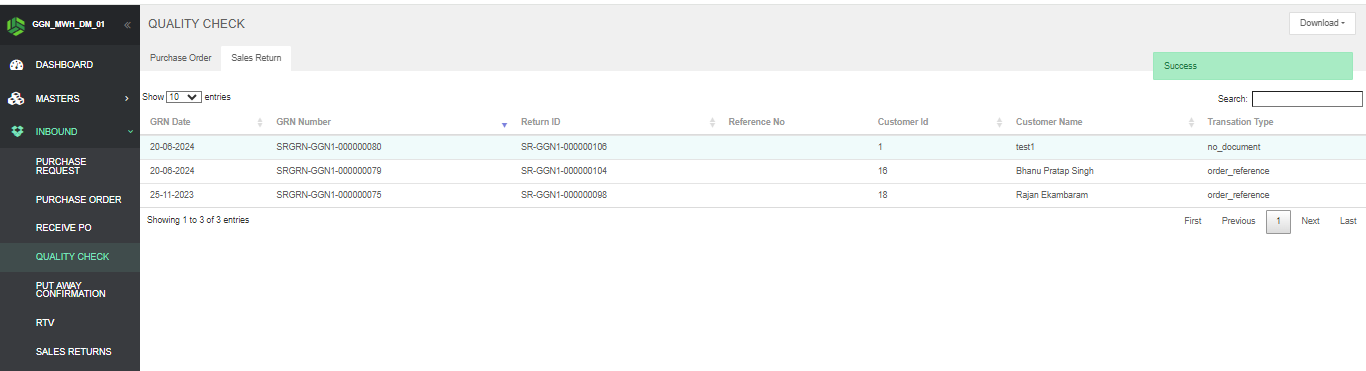
3. Once the GRN is done, it will now be reflected in "Inbound" > “Quality Check” > "Sales Return"

Enter the approved and/or rejected qty and click confirm.
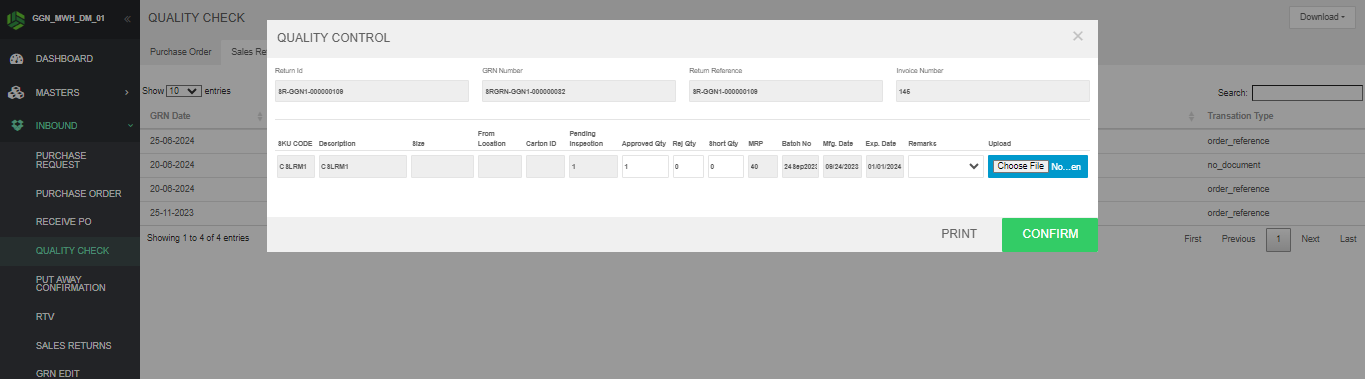
it will show success msg in upper right corner.
4. The entry will be available in “Inbound” > “Putaway Confirmation” >"Sales Return Putaway" tab
once you click the return ID the below pop will appear against that sales return ID
Here putaway can be done on system suggested location or any other user specified location
complete the putaway by clicking confirm.
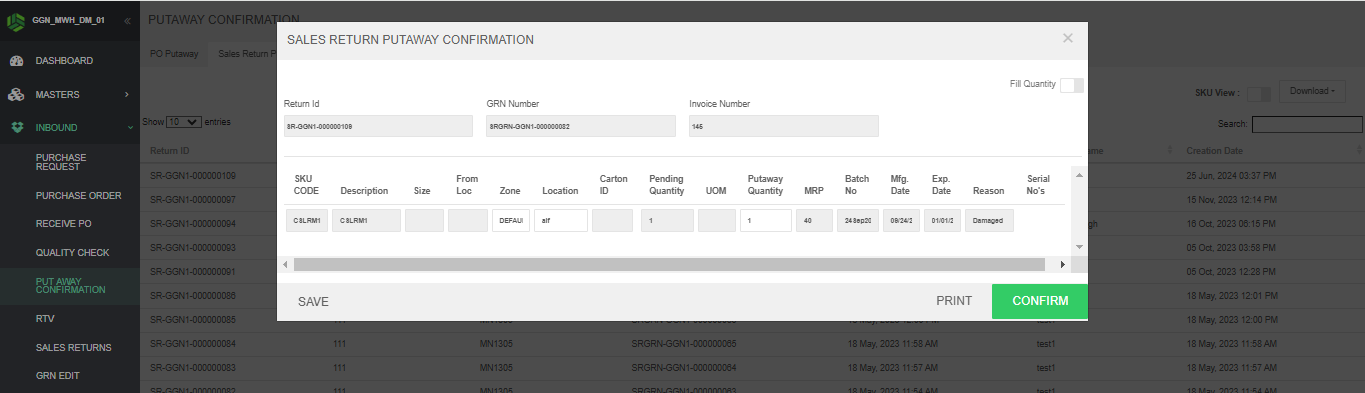
Once the putaway confirmation step is done, the stock will be added to the location.
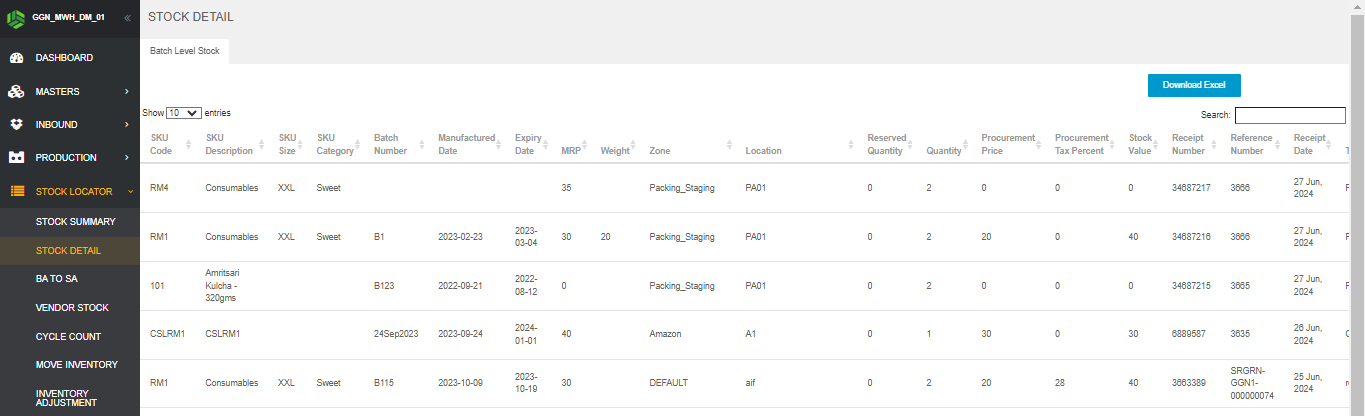
You can check the same in "Stock Locator" > "Stock Detail" tab.
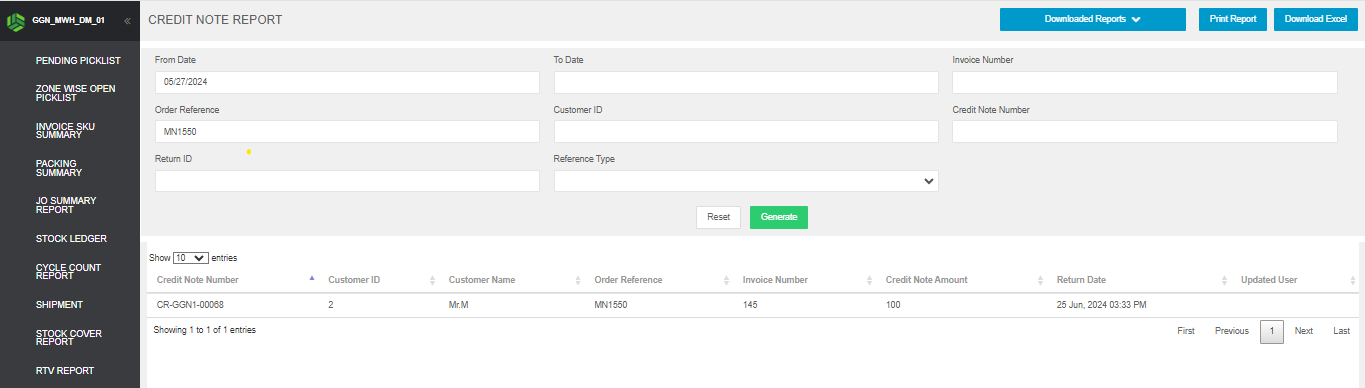
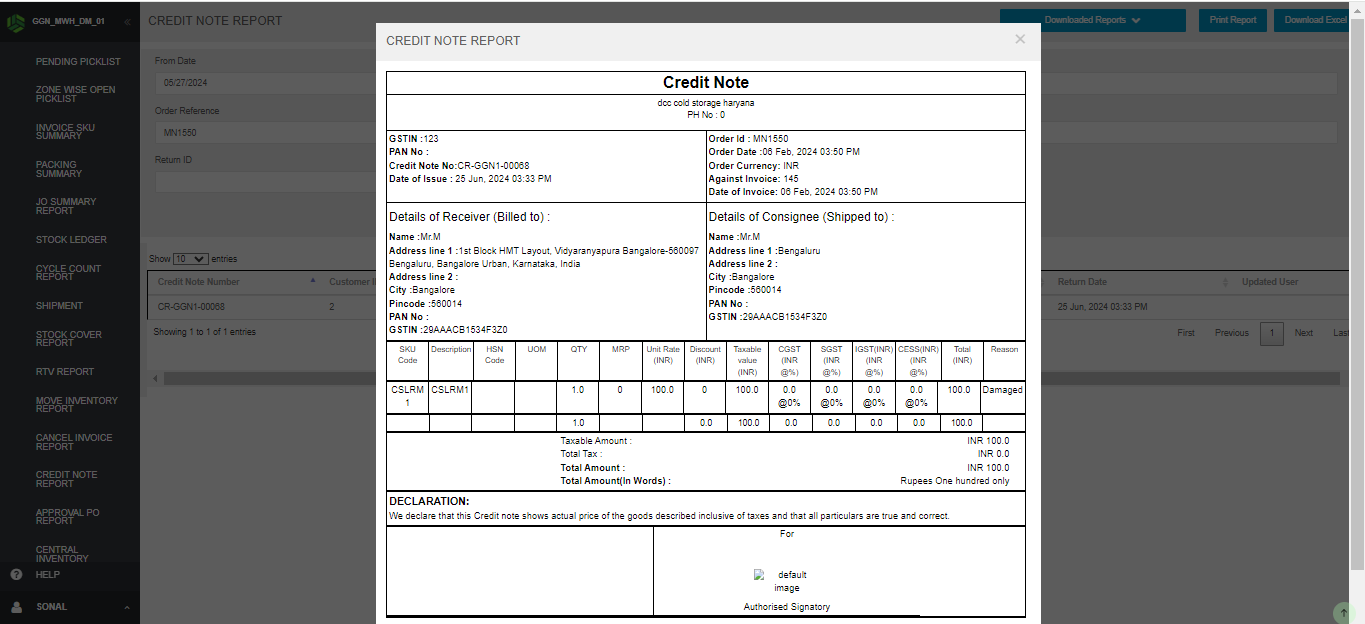
5. After we confirm the Sales Return, it will generate the credit note for the same which can also be printed from the Credit Note Report.